Adding custom CSS to your WordPress website is very common. Custom CSS is code that can be added to your blog that customizes how it looks. This is useful because, even though there are thousands of themes available on WordPress.org (and many more premium themes on sites like MyThemeShop.com), it’s almost impossible to find one with your exact vision pre-made. So you’re left choosing the one that closely matches your vision, and adding custom CSS to make it look exactly how you want.
Simple Custom CSS and JS
Simple custom CSS and JS is a plugin that lets you add custom CSS to your blog – I know, captain obvious here. But there are tons of custom CSS plugins available and I chose to tell you about one that also lets you add JavaScript (that’s what the “JS” stands for)! Why? All we need is some custom CSS! Well, what makes this plugin is special is not the JS, though that does add value to the plugin. It’s how this plugin allows you to organize, and customize, your custom CSS that makes it so special.

Most custom CSS plugins just give you a single, really big, plain, text box for all your CSS code snippets and a save button, then they decide how that code will be added to your site. Not much control there. Simple custom CSS and JS, however, lets you add each code snippet separately, and even toggle individual snippets on/off. So you can create a series of snippets for a specific theme, and if you change your theme but don’t want to lose your code snippets you can just disable them until you decide to switch back to that theme again.
This plugin also lets you choose whether to include a code snippet in your website or the admin area. So you now have the ability to customize the look, and functionality, of anything, anywhere on your blog! Awesome! You can even tell the plugin whether to load your snippet in the header (so that it’s one of the first things to load) or footer (so it’s one of the last things to load). As a general rule, I include the CSS in the header so that your site looks exactly as it should even while the page is still loading. I also, generally, include my JS in the footer so that the page can finish loading without being stuck waiting for some JS code to run (and because that’s where SEO-optimized websites put JS).
The main drawback to this, and most other “simple” CSS plugins, is the lack of support for LessCSS. But that really only matters to the hard-core coders.
How Do I Write Custom CSS
Once we’ve added the plugin, we need to figure out what CSS we need. If you don’t know CSS and the thought of code scares you, all hope is not lost. Leave a comment below with your site’s domain name and tell me what you want to change. I’ll try to help if I can. You could also head over to the support forum at WordPress.org and post a topic there where the WordPress community is also eagerly waiting to help you!
if you want to learn CSS, here are some great places to start:
- W3Schools – CSS Tutorial
- ManageWP – A Beginner’s Guide to Styling Your Website with CSS
- CSSTutorial.net
Custom CSS by Example
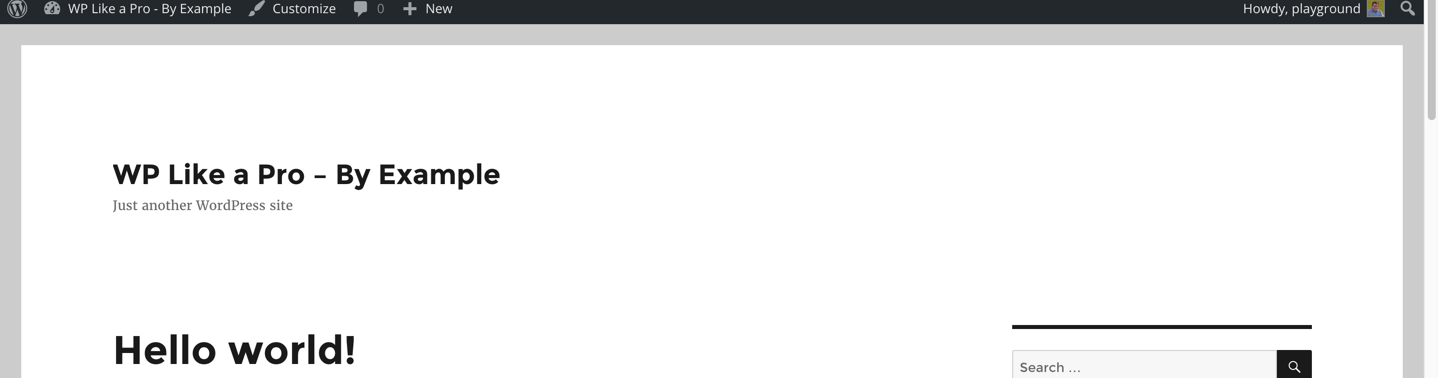
Let me walk you through an example of adding customized CSS to your WordPress blog with this plugin. Let’s say we want to use the Twenty Sixteen theme, but don’t like all that empty space around the site title. We want to change how something on the site looks – the reason we need to customize the CSS.
Once the plugin is installed, click on “Custom CSS and JS” in the admin navigation. This will show you a list of your snippets, which will be empty at first. To add a CSS snippet, click on “Add Custom CSS”, also in the admin navigation. You will be presented with a title box and a big, nicely formatted, text box to paste your CSS snippet into. Give the snippet any title you want, WordPress does not do anything with the title. Once you’ve pasted your snippet of CSS and given it a title, go ahead and publish your snippet, the default options are ideal for custom CSS.
So, getting back to our example, let’sreduce the amount of empty space around the site title. You’ll want to create a snippet just like the one pictured here:
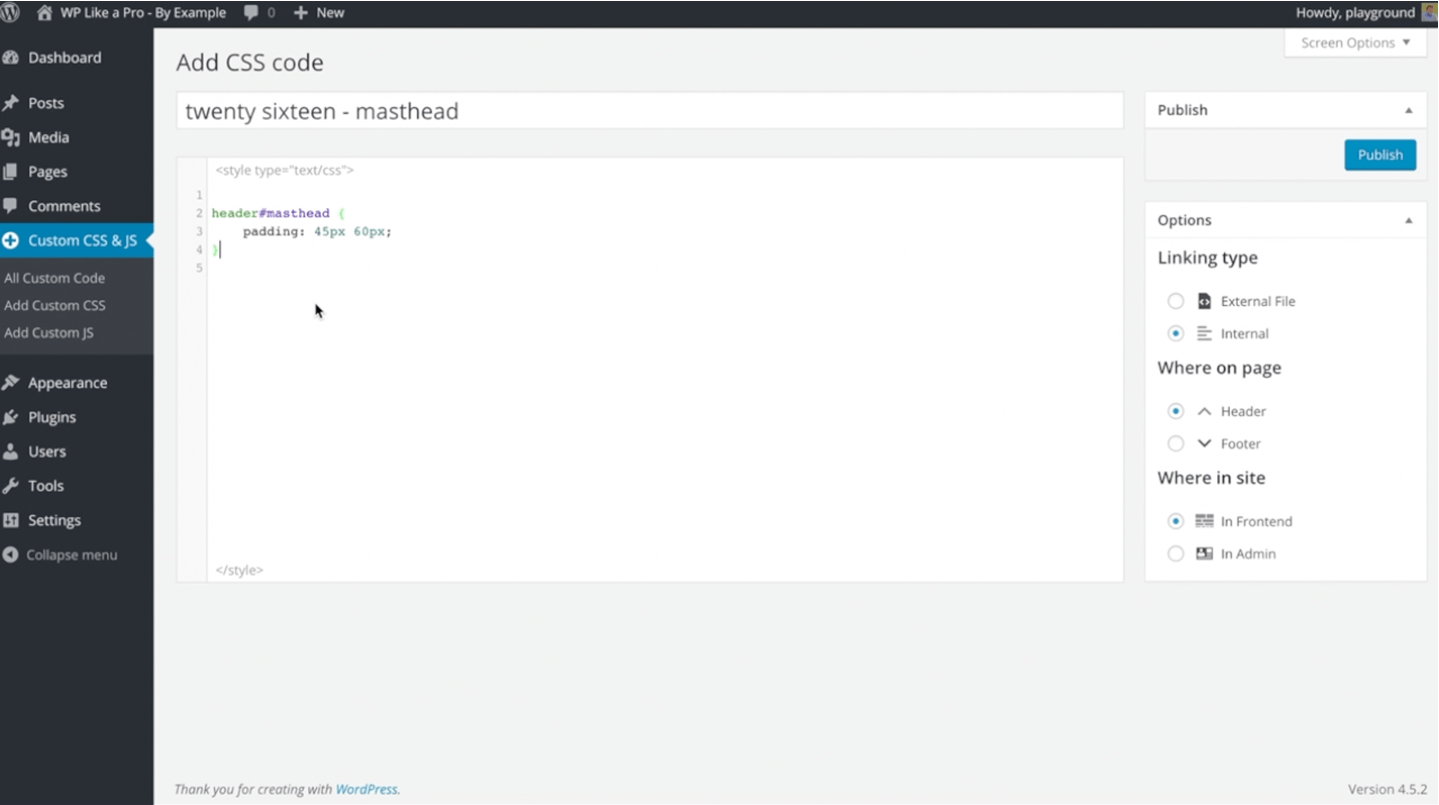
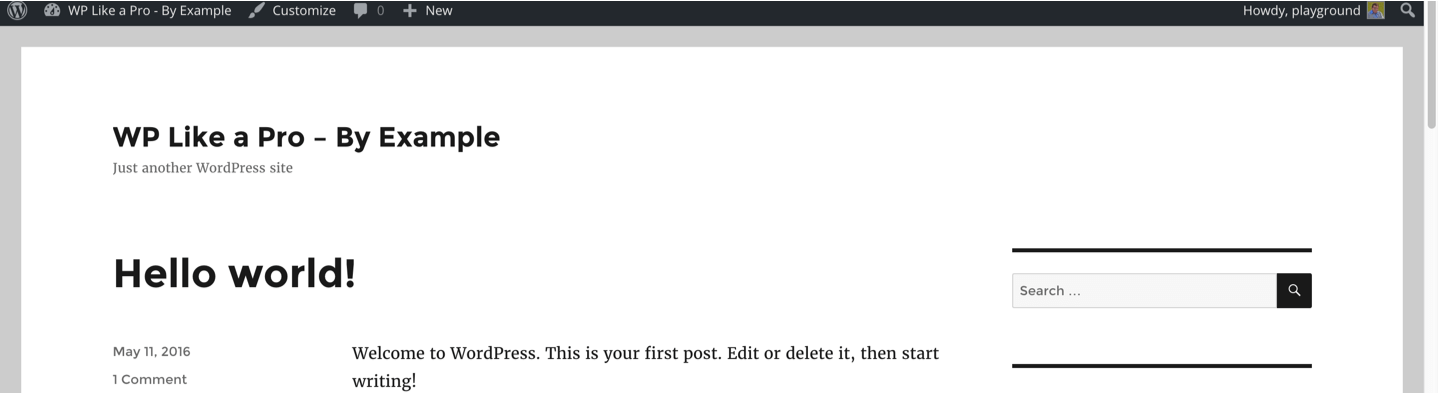
This will overwrite the existing “padding” property for the site’s “masthead” with a new value. And here are the before, and after, shots:
Conclusion
Adding custom CSS to your blog does not have to be complicated – no matter your level of CSS knowledge. I’ve shown you a plugin that lets you keep your CSS snippets organized and makes it easy to toggle snippets on/off so you can experiment more and not lose your work.
One note of caution: if you uninstall the plugin, you will lose all your snippets. So make sure you backup your blog before you do.
Have you added custom CSS to your WordPress blog using this, or another, plugin? Or do you use the custom CSS text box provided by your theme? I would love to hear about your experience in the comments below. Have a CSS question, or need, on your own blog? Comment below and maybe I can help!